Material and Lighting


As the quarter comes to an end it means its that time for wonderful final projects. Here Is my Material and lighting final. I Find myself being able to do these projects faster and faster, which is nice because I can put much more of the final and little details that I would like to put in. The project was like usual we take a pic and then have to re create it.

I think The most changeling part of this project was trying to get the shadows dark enough in the near corner while keeping the stairs and poles still visible, I managed by using some final gather cubes, and adjusting the material attributes a little.


You can see the floor is almost completely blown out from the sun, or maybe my camera just did it, but I couldn't get it to do that in Maya, so I retouched the photo a little in photoshop a little just to color correct some things.

ste-ROID


This was the second project of my material and lighting class. We had to come up with a object/character with the style of a movie or cartoon. So obviously I chose the theme from the Pixar movies Cars. I Loved the characters in that movie how each had there own persona. Being the sports person that I am thought of the idea of a football car character jacked up on some steroids. I went through some ideas in my head, like what kind of car to make, and what aspects of a football should I add to the car. I knew I wanted the facemask, and the football helmet shape. So9 I decided to go along the look of a SUV like car, since they have a big look, but can also have some speed. Its modeled slightly after a range rover. Most of the cars in the movie aren't exact replicas of real cars, most of them had softer edges, and more roundness to them. So that's what I was trying to go for with this character. The body of the car is shaped like a helmet, so it has the stripe down the middle, and a logo on the side.


The lighting was much simpler then the bathroom sink project. It's basically just a 3 point light setup, with a key, a fill and a back light. I had to add another fill light in the front because of the shape of the car, it left the front of the mouth area in too much darkness. Next came the reflection of lights. In the movie, when lightning McQueen is racing, you can see all the lights from the stadium reflecting of his body. I wanted to create that effect too.


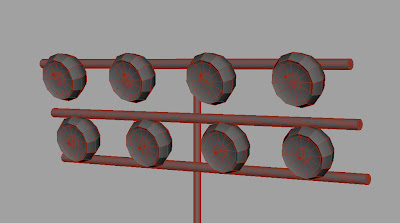
I made a stadium like setup with the spotlights you would see from a stadium. I put point lights on them and turn there diffuse attribute off so it wouldn't wash out Roid, but still reflect off him. I then made 6 copies or so and circled it around him giving the effect of stadium lights. The project came out the way I wanted it to. I wish I had more time with it though, It was during finals and I had to get some other projects done, but I plan on rigging it after I finish my rigging class, then I can play with it a little more.


Material and Lighting

This was a class assignment I did last quarter for material and lighting. Beginning that quarter of school I told my self to start pushing myself in my work. I felt that before that I was just kinda hanging around. So I took it upon myself to really go above and beyond on the first assignment of the class, and i think I achieved my goal.


The image to top is the original picture I took from my digital camera of my dirty bathroom. The picture to the bottom is done in 3D. I modeled, lit, textured and rendered it on my own. The modeling wasn't too difficult except for the sink, reasons being is that I think the image had some sort of distortion on it because I measured my sink for its dimensions and everything, and my model just didn't match up with the picture. So i ended up just deforming the sink to look like it did. So from any other angle the sink would look like a misshapen oval.


The most difficult part by far was the lighting. The picture had a mixture of hard and soft shadows. But my bathroom only had 2 lights in the room, so I had to figure out how to get some of the objects to cast soft shadows and others hard. I went through many trials and errors, and I'm so glad, i learned so much from this project, that now i find myself getting through lighting and texturing stuff so much faster. I used some basic light linking to get the right shadows from all the objects but will still getting the shadows a light Grey color. I then found that I can turn the shadow intensity to a negative value!! This made a little light bulb in my head go off and knew that I could change the light intensity so low that it wouldn't effect the overall materials and then crank up the negative shadow, resulting in a very dark shadow, while keeping the the ones I wanted light.


After that It was just a process of trial and error trying to get everything to look right. The textures were pretty simple. Just used a UV layout program and applied the right textures to what I think I saw. I wish i spent more time on them though. Overall i fell that this project came out as a success. there are still something to me that jump and I think "wow! that looks horrible!" but I'm sure I will feel like that on 90% of my projects.


Super Jump


My assignment super jump, kind of want to polish it out a little more, but we'll see. I'll have a render coming soon also!

super jump


Here's my jump animation so far. It's just the key poses so far and the timing is still a little rough.